

Key takeaways
- 8 medium jalapeños, about 3–4 inches long each
- 8 ounces full-fat block cream cheese, softened
- 4 ounces finely shredded sharp cheddar or Monterey Jack
- 2 tablespoons finely sliced scallions or chives
- 1 small garlic clove, grated, or 1/4 teaspoon garlic powder
- 1/4 teaspoon fine salt
- 1/4 teaspoon smoked paprika
- Optional: 4 ounces cooked, crumbled bacon
The best jalapeo poppers recipe oven and air fryer method depends on your batch size: use an air fryer at 375°F (190°C) for the crispest small batch in 8–10 minutes, or bake at 425°F (220°C) for 18–22 minutes when you need to cook a full tray. For either method, use a 2:1 filling ratio of cream cheese to shredded cheese, chill the stuffed peppers before cooking, and leave a visible rim of pepper around the filling to prevent bursting.
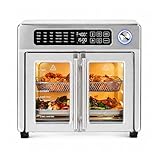
Air frying gives the breading more rapid browning and a firmer shell, while the oven offers better capacity and more even cooking for a party-size batch. The recipe below includes both methods, exact quantities, optional breading, and practical adjustments for mild, hot, creamy, or extra-crispy poppers.
Our top picks


As an Amazon Associate we earn from qualifying purchases at no extra cost to you. Ratings are shown as listed on Amazon.
Quick comparison: oven versus air fryer
| Method | Best batch size | Temperature | Cooking time | Texture | Main trade-off |
|---|---|---|---|---|---|
| Air fryer | 8–12 halves | 375°F / 190°C | 8–10 minutes | Crisp breading, lightly blistered pepper | Usually requires multiple batches |
| Oven, breaded | 16–24 halves | 425°F / 220°C | 18–22 minutes | Evenly browned, moderately crisp | Needs preheating and a hot tray |
| Oven, unbreaded | 16–24 halves | 400°F / 205°C | 20–25 minutes | Soft, creamy, roasted edges | Not as crunchy as a breaded version |
Ingredients for 16 jalapeño popper halves
- 8 medium jalapeños, about 3–4 inches long each
- 8 ounces full-fat block cream cheese, softened
- 4 ounces finely shredded sharp cheddar or Monterey Jack
- 2 tablespoons finely sliced scallions or chives
- 1 small garlic clove, grated, or 1/4 teaspoon garlic powder
- 1/4 teaspoon fine salt
- 1/4 teaspoon smoked paprika
- Optional: 4 ounces cooked, crumbled bacon
For the optional breading
- 1/2 cup all-purpose flour
- 2 large eggs, beaten with 1 tablespoon water
- 1 cup panko breadcrumbs
- 1 tablespoon neutral oil, such as avocado, canola, or vegetable oil
- Optional: 2 tablespoons finely grated Parmesan and 1/4 teaspoon smoked paprika
The filling uses 8 ounces of cream cheese to 4 ounces of shredded cheese, a 2:1 ratio by weight. This proportion is firm enough to stay inside the pepper but soft enough to spread without tearing the jalapeño. Adding more shredded cheese than cream cheese can make the filling oily and more likely to leak during cooking.
Prepare the jalapeños without making them burst
- Wash and dry the peppers thoroughly. Surface water prevents oil and breading from adhering and can cause uneven browning.
- Cut each jalapeño lengthwise. For a classic half-shell, slice through the stem end and leave the stem attached if you want a handle. For easier eating, remove the stem completely.
- Remove the seeds and pale membranes. Use a small spoon or the tip of a paring knife. The membranes contain much of the pepper’s heat, so removing all of them produces a milder popper; leaving some creates a hotter version.
- Keep the pepper halves intact. Avoid scraping so aggressively that the walls become thin. A shell approximately 1/8 to 3/16 inch thick holds its shape better while roasting.
- Pat the inside dry. Moisture can loosen the filling and make a breaded coating slide off.
Wear disposable gloves if your skin is sensitive to chili peppers, and avoid touching your eyes while preparing them. Wash knives, cutting boards, and hands with hot soapy water after handling the peppers.
Make the filling and choose the topping
- Mix the filling. Stir the softened cream cheese, shredded cheese, scallions, garlic, salt, and smoked paprika until evenly combined. Fold in bacon last if using it.
- Fill each half with about 1 1/2 tablespoons. The mixture should reach the top but not form a high mound. Leave approximately 1/8 inch of pepper visible around the edge.
- Chill the filled peppers for 20–30 minutes. This firms the cream cheese and reduces leakage. For advance preparation, cover and refrigerate them for up to 24 hours.
Three breading options
- Unbreaded: Brush the exposed filling lightly with oil or leave it plain. This is the lowest-mess option and lets the roasted jalapeño flavor stand out.
- Light crumb topping: Mix panko with oil, then sprinkle 1 tablespoon over each four poppers. This gives crunch without the extra flour-and-egg steps.
- Full breading: Dip each chilled popper in flour, then egg, then seasoned panko. Press the crumbs gently onto the filling. This produces the most protective crust but takes longer and can soften if the poppers are crowded.
For a full breading, the flour-and-egg coating is approximately 1 tablespoon flour and 1/4 egg by volume per four poppers. You will need more in each bowl for dipping, but much of it remains unused. Mixing 1 tablespoon Parmesan into the panko adds savory flavor, while too much cheese can brown before the pepper is tender.
Air fryer method: fastest and crispiest for small batches
- Preheat the air fryer to 375°F (190°C) for 3–5 minutes. A preheated basket begins browning the coating immediately instead of slowly warming the filling.
- Lightly oil the basket. Use spray oil or brush on a thin film. Do not line the basket with solid parchment during preheating, because it can interfere with airflow or lift toward the heating element.
- Arrange the poppers in one layer. Place them filling-side up with at least 1/2 inch between pieces. Air circulation is essential for crisp breading.
- Air fry for 8–10 minutes. Check at 8 minutes. Unbreaded poppers may be ready in 7–9 minutes, while thickly breaded or refrigerated poppers may need 10–12 minutes.
- Rest for 5 minutes before serving. The filling continues to set, making it less likely to spill when bitten.
The target appearance is golden panko, softened pepper walls, and filling that is hot but still contained. If the crumb browns before the pepper softens, reduce the temperature to 350°F (175°C) and add 2–3 minutes. If the poppers remain pale, increase the temperature to 390°F (199°C) for the final 1–2 minutes, watching closely.
Oven method: best for a full tray
- Place a rimmed baking sheet in the oven and preheat to 425°F (220°C). A hot tray gives the bottom of the breading a faster start. If using a glass or ceramic dish, do not preheat it empty; use a metal sheet pan instead.
- Prepare the poppers while the oven heats. Arrange them filling-side up on the hot tray lined with parchment or a wire rack set over the tray. A rack allows airflow underneath and keeps the bottoms less damp.
- Bake breaded poppers for 18–22 minutes. Rotate the tray at the 10-minute mark if your oven browns unevenly.
- Bake unbreaded poppers at 400°F (205°C) for 20–25 minutes. The lower temperature helps the pepper soften without causing the cheese to split as quickly.
- Rest for 5–7 minutes. Do not transfer them immediately to a serving plate; the filling is most fluid when it first leaves the oven.
For an extra-brown finish, use the broiler for 30–60 seconds at the end, keeping the tray several inches from the element. Stay beside the oven because panko and cheese can go from browned to burned quickly.
How to prevent leaking and bursting
- Do not overfill. Use 1 1/2 tablespoons of filling for an average 3–4-inch half. Oversized peppers may take 2 tablespoons, but the filling should remain level with the rim.
- Chill before cooking. Twenty minutes is enough to firm the mixture; overnight refrigeration is suitable for meal preparation.
- Avoid watery ingredients. Fresh tomatoes, salsa, and wet spinach release steam and liquid. Drain them thoroughly or use no more than 1 tablespoon per 8 ounces of cream cheese.
- Keep the filling cold until cooking. Warm filling melts before the pepper shell has time to soften.
- Use filling-side up. This keeps melted cheese from running directly onto the tray and allows the pepper to act as a small container.
- Do not pierce the pepper shells. Small cuts allow steam and cheese to escape during cooking.
- Leave room between poppers. Crowding traps moisture and softens the crust. A 12-inch air-fryer basket generally holds 8–12 halves in one layer; a standard half-sheet pan holds about 24 halves.
Which method should you choose?
| Your situation | Recommended method | Reason |
|---|---|---|
| Cooking 8–12 popper halves | Air fryer | Shorter 8–10 minute cook and stronger airflow for crisp crumbs |
| Cooking 16–24 halves | Oven | A half-sheet pan handles a larger batch without stacking |
| Want the least cleanup | Unbreaded oven or air fryer | No flour, egg, or loose crumbs |
| Want the crunchiest shell | Air fryer with panko | Fast circulating heat removes surface moisture quickly |
| Preparing ahead for a gathering | Oven | Filled poppers can be chilled on a tray and baked together |
Serving, storage, and reheating
Serve the poppers after a five-minute rest with sour cream, ranch-style dressing, lime crema, or a cool bean dip. The recipe yields 16 halves, or approximately four servings at four halves each. For a party appetizer, plan on two to three halves per person alongside other food.
Refrigerate leftovers in a shallow covered container within two hours of cooking. They keep for up to three days. Reheat in an air fryer at 350°F (175°C) for 3–5 minutes or in a 400°F (205°C) oven for 8–10 minutes. Avoid the microwave when crispness matters: it softens the breading and can make the cheese filling separate.
The breading is the first part to lose quality during storage, while the pepper shell can become softer after reheating. For the best make-ahead result, refrigerate the stuffed, unbaked poppers for up to 24 hours and cook them just before serving. Add 1–3 minutes to the stated time if they go directly from the refrigerator to the appliance.
Frequently Asked Questions
What temperature is best for jalapeño poppers in an air fryer?
Cook breaded jalapeño poppers at 375°F (190°C) for 8–10 minutes. Unbreaded poppers usually need 7–9 minutes, depending on their size and how soft you prefer the pepper. Arrange them in one layer and check early because air-fryer heating intensity varies by model.
Should jalapeño poppers be covered when baking?
No, leave them uncovered so the breading can dry and brown. Covering traps steam, which makes the coating soft and can loosen it from the pepper. If the tops are browning too fast, lower the oven temperature by 25°F rather than covering the poppers.
Why did my jalapeño poppers burst?
They usually burst because they were overfilled, the filling was warm, or the peppers were cooked at excessive heat for too long. Keep about 1/8 inch of pepper visible around the filling, chill the prepared poppers for 20–30 minutes, and cook them filling-side up.
Can I make jalapeño poppers without breading?
Yes. Fill the pepper halves and bake them at 400°F (205°C) for 20–25 minutes, or air fry them at 375°F (190°C) for 7–9 minutes. The result is creamy and roasted rather than crunchy, with less cleanup and a lower risk of loose crumbs.
Can I freeze homemade jalapeño poppers?
Freeze filled, unbaked poppers in a single layer until solid, then transfer them to an airtight freezer container for up to two months for best quality. Cook them from frozen at 375°F (190°C) in an air fryer for about 12–16 minutes, or at 425°F (220°C) in an oven for about 25–30 minutes. Check that the pepper is tender and the filling is hot before serving.
How can I make jalapeño poppers less spicy?
Remove all seeds and pale inner membranes, then choose smooth, medium-sized jalapeños rather than very large or heavily ridged ones. Cream cheese and shredded cheese also moderate the perceived heat, although they do not remove capsaicin. Wear gloves while cleaning the peppers to avoid transferring the heat to your eyes or skin.





Write Your Review
No reviews yet. Be the first to share your experience!