

Key takeaways
- The brewer’s rated watts or amps.
- Your inverter’s continuous and surge ratings.
- Whether the outlet is powered by the inverter, shore power, or a generator.
- Whether the circuit, plug, fuse, and extension cable are rated for the load.
The best RV coffee makers are compact, low-wattage brewers with secure lids, a manageable water tank, and a power requirement your RV can supply without overloading its inverter: choose the AeroPress Go for the smallest electrical footprint, a 12-volt brewer for battery-based coffee, or a compact 120-volt drip machine when you have reliable campground power.
Our top picks


As an Amazon Associate we earn from qualifying purchases at no extra cost to you. Ratings are shown as listed on Amazon.
Quick picks by RV situation
| RV coffee maker | Best for | Power draw | Brewing capacity | Approximate footprint or storage size | Main compromise |
|---|---|---|---|---|---|
| AeroPress Go | Dry camping, one or two people, minimal storage | None | About 8 oz per brew | Approximately 5 x 5 x 11.5 in assembled; packs into its mug | Requires heated water and manual pressing |
| Wacaco Pipamoka | Portable manual brewing without a kettle | None | About 8 oz | Approximately 2.8 in diameter x 6.5 in tall | Small serving and slower preparation |
| Compact 5-cup drip brewer | Two people with shore power or a generous inverter | Typically 650–750 watts | About 20–25 oz, using 5-oz “cups” | Usually about 8 x 6 x 10 in | Higher startup load and more spill-prone glass carafes |
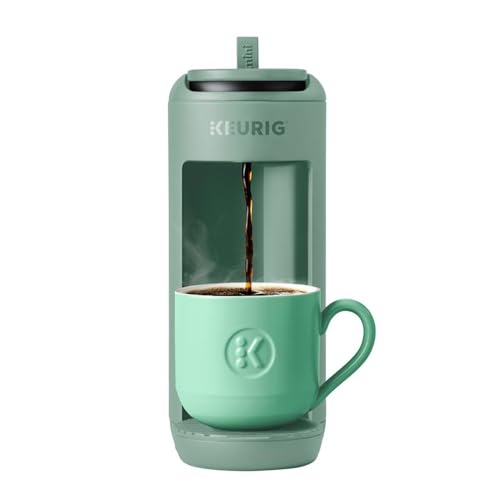
| Keurig K-Mini | Single-serve convenience at powered campsites | Up to about 1,470 watts | 6–12 oz per brew | Approximately 12.1 x 4.5 x 11.3 in | Too demanding for many small inverters |
| 12-volt single-serve brewer | Truck campers and vans with a suitable 12-volt outlet | Commonly 100–200 watts, depending on model | Usually 8–12 oz | Often about 6–8 in wide and 8–12 in tall | Slow heating and strict wiring requirements |
Dimensions and power ratings vary by model revision, so confirm the label or manual before buying. The comparison is intended to show the practical differences between categories, not to replace the manufacturer’s electrical specifications.
What matters most in an RV coffee maker
Power draw and electrical compatibility
Wattage is the first filter. A 1,470-watt pod machine can exceed the continuous output of a small 1,000-watt inverter, while a 700-watt drip brewer may work but leave little capacity for a refrigerator, fan, or microwave. Heating appliances also create a high load for several minutes, so an inverter’s continuous rating matters more than its short-term “peak” figure.
For a 12-volt system, convert watts to approximate current with this formula:
Amps = watts ÷ volts.
A 150-watt 12-volt brewer draws about 12.5 amps before accounting for wiring and conversion losses. A 700-watt appliance connected through an inverter may pull roughly 65–75 amps from a 12-volt battery while heating. That is why a coffee maker that seems modest on the AC side can still be unsuitable for a small battery bank.
Check four things before using an electric model:
- The brewer’s rated watts or amps.
- Your inverter’s continuous and surge ratings.
- Whether the outlet is powered by the inverter, shore power, or a generator.
- Whether the circuit, plug, fuse, and extension cable are rated for the load.
Do not run a high-wattage brewer from a thin 12-volt accessory socket or an improvised adapter. For uncertain wiring, use a qualified RV technician.
Capacity without wasting water
Manufacturers often call 5 fluid ounces a “cup,” so a 5-cup brewer does not produce five typical 10- to 12-ounce mugs. Its practical output is about two generous mugs. A single-serve machine is easier to portion, but its minimum setting may still use 6 ounces plus water retained in the grounds or pod.
For two coffee drinkers, look for at least 20 ounces of usable capacity. For one person, an 8- to 12-ounce manual or pod brewer reduces gray-water waste and avoids keeping a large tank full between trips.
Countertop footprint and storage
Measure the usable surface, not just the counter’s overall width. Leave room to open a lid, remove a filter basket, and place a mug beneath the outlet. A brewer that is 6 inches wide may need another 8 inches above it to fill its tank.
In a moving RV, storage height matters as much as counter width. Manual brewers such as the AeroPress Go nest into their cup, while tall electric machines may need a dedicated cabinet. Avoid storing a glass carafe loose in a cabinet; vibration can chip the handle or break the glass.
Spill resistance
Prioritize a locking water-tank lid, a drip-stop that closes when the carafe is removed, a stable base, and a travel-safe mug. A flat, wide footprint is more valuable than a decorative compact shape. Avoid leaving water in a removable tank during travel, because sloshing can reach the electronics or leak through the lid.
Thermal carafes are safer than glass for transit, but they increase purchase cost and may be awkward to clean. For any brewer, let the heating cycle finish before moving it and secure the power cord so it cannot catch on a cabinet or sink.
Head-to-head: manual, 12-volt, or 120-volt?
Manual brewers: the safest dry-camping choice
The AeroPress Go uses no electricity, packs into its drinking cup, and produces one concentrated serving that can be diluted to taste. It is a strong choice when counter space and battery capacity are limited. Its paper microfilters are consumables, and the plunger seal eventually wears, but replacement parts are easy to store.
The Wacaco Pipamoka is similarly compact and uses a built-in twisting mechanism to brew coffee inside its travel vessel. It is useful when you want a self-contained cup, but its smaller output and more involved cleaning make it less suitable for serving a group.
Manual brewers still need hot water. An RV propane stove, induction cooktop, or separate low-watt kettle may supply it, but those alternatives shift the power or fuel calculation rather than eliminating it.
12-volt brewers: convenient, but wiring-sensitive
A 12-volt brewer can be a good fit for a van or truck camper with a properly fused outlet near the galley. Expect slower heating than with a household machine. The plug, cable, and socket may become warm under sustained load; that is a warning to stop and inspect the setup, not a normal operating condition.
These brewers are most practical for one serving at a time. Before purchase, confirm whether the stated capacity means finished coffee or water loaded into the reservoir, and whether the plug is designed for a cigarette-lighter socket or a dedicated connector.
120-volt drip machines: best at full hookups
A compact 5-cup drip brewer offers the easiest two-person workflow and a useful water-to-coffee ratio. Look for a reusable or standard basket, a non-drip valve, and a carafe that sits securely in the warmer. Choose a model with an insulated carafe if you want to avoid a hot plate, which can continue drawing power after brewing.
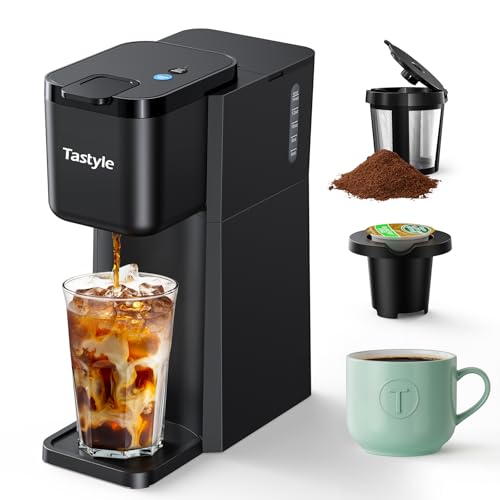
Pod machines are fast and tidy, but their high heating load is the key limitation. They make sense when connected directly to shore power or a generator with adequate capacity—not when relying on a small inverter simply because the machine physically fits the counter.
A practical decision matrix
| Your situation | Best choice | Why | What to avoid |
|---|---|---|---|
| Dry camping and limited battery | Manual brewer | Zero electrical draw and minimal storage | High-wattage pod machines |
| One coffee drinker every morning | 8–12 oz manual or 12-volt brewer | Less water, less cleanup, and smaller footprint | Large drip tanks that sit with stale water |
| Two or more drinkers at a powered campground | Compact drip brewer | 20–25 oz output in one cycle | Single-serve machines if speed and waste matter |
| Very little counter space | AeroPress Go or Pipamoka | Stores inside its cup or vessel | Tall brewers with rear-mounted tanks |
| Frequent pod use | Pod machine on shore power | Fast, portioned brewing and simple operation | Running it from an undersized inverter |
Ownership details that affect the best choice
The first parts likely to wear are silicone seals, pump components, carafe lids, and hot-plate coatings. Hard water accelerates scale in electric heating chambers, reducing flow and increasing heating time. Follow the maker’s descaling instructions; do not assume vinegar is approved, since some manufacturers recommend a specific cleaner.
Rinse a reusable basket after every use, empty grounds before they dry, and leave removable parts open to air-dry. Once a week during regular travel, inspect the tank seal, power cord, and carafe for cracks. Never store a wet brewer closed in a cabinet, where odors and microbial growth can develop.
A common RV mistake is filling the reservoir to its maximum line and then moving the vehicle. Empty it before driving. Another is placing the brewer beside the sink where a loose hose or wet dish can splash the controls. Give the machine a stable, dry location and use a non-slip mat if the manufacturer permits it.
Bottom line
For most compact camp kitchens, the AeroPress Go offers the best balance of footprint, spill resistance, and zero electrical demand. Choose a 12-volt brewer only when your outlet and wiring are designed for its load. If you normally have shore power and make coffee for two people, a compact 5-cup drip machine is the more convenient choice. Treat high-wattage pod brewers as full-hookup appliances, and verify the inverter, battery, fuse, and outlet ratings before plugging one into an RV system.





Write Your Review
No reviews yet. Be the first to share your experience!