

Key takeaways
- The distance from the opening to the nearest side wall.
- Whether the cabinet has a back panel that reduces usable depth.
- The location of the receptacle and whether the power cord needs clearance behind the appliance.
- The thickness of the cabinet face frame, if present.
- The height of the appliance above the floor, especially if children or shorter users will operate it.
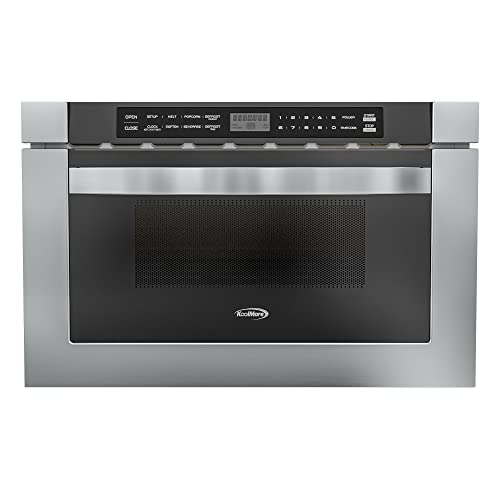
The best built-in microwaves are the ones whose cutout, trim kit, ventilation arrangement, wattage, and controls match your cabinetry—not necessarily the largest or most powerful model. For most standard kitchen installations, the Bosch HMB50152UC is a strong 24-inch choice, the Sharp SMD2470AS suits shoppers prioritizing a low-profile drawer-style design, and the GE Profile PEB7227DLBB is worth considering when you need a larger cavity and higher wattage.
Our top picks



As an Amazon Associate we earn from qualifying purchases at no extra cost to you. Ratings are shown as listed on Amazon.
Best built-in microwaves by kitchen situation
| Kitchen situation | Best fit | Why it makes sense | Watch out for |
|---|---|---|---|
| Replacing an existing 24-inch built-in | Bosch HMB50152UC or a comparable 24-inch model | Common width, 1.6-cubic-foot capacity, and 1,000 watts | Confirm the exact opening height and depth before ordering |
| Limited vertical space | Sharp SMD2470AS | Drawer-style opening and a relatively low front profile | It is not an over-the-range ventilation system |
| Large dishes and frequent family use | GE Profile PEB7227DLBB | 2.2-cubic-foot cavity and 1,100-watt output | Often needs a specific GE trim kit and a taller cutout |
| Clean, integrated appearance | A matching microwave and manufacturer-approved trim kit | The trim frame hides gaps and creates a finished cabinet face | Universal trim kits may not fit safely or look aligned |
| Need a hood or exhaust fan above a cooktop | An over-the-range microwave | Combines microwave use with recirculating or externally vented exhaust | A standard built-in microwave usually cannot replace a range hood |
Head-to-head comparison: dimensions, power, and capacity
The figures below are useful starting points, but treat them as model-family references rather than permission to cut cabinetry. Manufacturers can specify separate appliance dimensions and installation cutout dimensions, and the required opening can change with the trim kit.
| Model | Nominal width | Capacity | Cooking power | Approximate appliance dimensions | Installation note |
|---|---|---|---|---|---|
| Bosch HMB50152UC | 24 inches | 1.6 cu. ft. | 1,000 watts | About 23.9 W × 17.1 H × 22.3 D inches | Use the Bosch-specified trim kit and cutout |
| Sharp SMD2470AS | 24 inches | 1.2 cu. ft. | 1,000 watts | About 23.9 W × 15.9 H × 23.1 D inches | Drawer-style installation; verify cabinet depth and electrical access |
| GE Profile PEB7227DLBB | 27-inch trim-kit configuration | 2.2 cu. ft. | 1,100 watts | About 23.6 W × 13.6 H × 23.6 D inches before trim | Trim-kit dimensions determine the finished opening |
| Typical 24-inch built-in microwave | 24 inches | 1.0–1.6 cu. ft. | 900–1,000 watts | Approximately 23.5–24 W × 15–18 H × 20–24 D inches | Do not assume another brand’s trim kit is interchangeable |
For most households, 1.0 to 1.2 cubic feet handles plates, bowls, reheating containers, and standard microwave cookware. A 1.6- to 2.2-cubic-foot cavity is more useful for large casserole dishes, but it can require a taller or deeper cabinet opening. Capacity alone does not tell you whether a particular dinner plate will fit comfortably: turntable diameter, interior height, and door clearance matter too.
Cutout dimensions are more important than the advertised width
A “24-inch microwave” is not designed for every 24-inch opening. Measure the finished cabinet opening in three places for width, height, and depth, then use the smallest measurement. Also record:
- The distance from the opening to the nearest side wall.
- Whether the cabinet has a back panel that reduces usable depth.
- The location of the receptacle and whether the power cord needs clearance behind the appliance.
- The thickness of the cabinet face frame, if present.
- The height of the appliance above the floor, especially if children or shorter users will operate it.
Do not size the opening from the appliance’s outer dimensions alone. The installation guide may require a few millimeters or fractions of an inch of clearance for airflow, fastening brackets, and the trim frame. A cabinet opening that is technically wide enough can still fail if the trim overlaps a hinge, the cord is crushed, or the rear clearance is insufficient.
Trim kits: essential for most built-in installations
A countertop microwave placed inside a cabinet is not automatically a built-in microwave. It may lack the front ventilation path, mounting hardware, and heat clearances required for enclosed installation. A manufacturer-approved trim kit normally provides a finished frame, air channels, and brackets designed for a particular appliance.
Trim kits are often model-specific even when two microwaves have the same nominal width. They can also change the required cutout height and the visible amount of stainless steel or black glass. If you are replacing an old microwave, do not assume the existing trim frame can be reused. Compare the new model’s installation drawing with the old opening before removing cabinetry.
Budget for the trim kit separately when comparing prices. A built-in configuration can add a general market cost of roughly $100 to $400, depending on the brand, finish, and size. Integrated drawer-style models commonly cost more than conventional built-in units.
Ventilation: built-in does not mean vented
This is the most consequential terminology issue. A conventional built-in microwave is usually designed to circulate air around the appliance and does not remove steam, smoke, or grease from a cooktop. It should not be treated as a substitute for a range hood.
Over-the-range microwaves are the category normally designed to provide recirculating or externally ducted ventilation. They have different mounting, clearance, and electrical requirements. If the microwave will sit above a wall oven or in a tall cabinet, plan separate ventilation for the cooking surface where required by local code and the appliance manufacturer.
Never block the microwave’s intake or exhaust openings with cabinet trim, decorative panels, or stored items. Poor airflow can increase heating time and shorten the life of internal components.
Wattage and control layouts
Wattage affects heating speed, but it is not the only performance factor. A 1,100-watt model can shorten reheating compared with a 900-watt unit, while sensor programs may matter more for avoiding overheated edges and cold centers. If your household frequently reheats leftovers, boils water, or cooks frozen foods, 1,000 to 1,100 watts is a practical target.
Controls should be judged from the user’s normal routine:
- Numeric keypad: best for entering an exact time quickly.
- Large dial or sliding control: easy to use with wet or messy hands, but less precise for short intervals.
- Door-mounted touch controls: create a clean appearance but may require more steps to start a basic cycle.
- Sensor cooking: useful for reheating foods with changing moisture levels; it does not eliminate the need to cover food or stir it when appropriate.
- Popcorn and beverage presets: convenient, but preset results vary with portion size, container shape, and starting temperature.
Check whether the control panel can be locked, whether the display can be dimmed, and whether the door opens from the side or slides out. A drawer-style unit can be easier to load without reaching upward, while a conventional door may provide a larger and clearer view of the interior.
A practical fit calculation before you buy
Suppose your cabinet opening measures 24 1/8 inches wide, 16 7/8 inches high, and 23 inches deep at its shallowest point. A microwave listed at 23 7/8 inches wide, 17 1/8 inches high, and 22 1/4 inches deep may appear to fit by width and depth, but it fails the height check before the trim kit is even considered: 17 1/8 inches is 1/4 inch taller than the opening.
That small difference can require cabinet modification or make the model unusable. The correct process is to compare the three opening measurements with the manufacturer’s required cutout dimensions, not merely subtract appliance dimensions from cabinet dimensions.
Ownership realities: what wears first
The door latch, keypad or touch panel, turntable coupler, interior coating, and cooling fan are common wear points. Grease and food residue around the door seal can prevent smooth closing, while running the oven empty can damage the magnetron. Heavy glass dishes can crack a turntable or stress the rotating guide.
- Wipe spills after the cavity cools; avoid abrasive pads that scratch the interior coating.
- Clean the turntable and roller ring regularly so they do not drag or wobble.
- Use microwave-safe cookware and leave space for steam to escape when covering food.
- Do not operate the unit empty or with metal unless the manufacturer specifically permits a feature involving metal.
- Keep the trim-kit ventilation openings free of dust and grease.
For a streamlined kitchen, the best built-in microwaves are therefore matched by installation geometry first, cooking power second, and convenience features third. Select the appliance only after confirming the exact cutout drawing, approved trim kit, ventilation plan, electrical location, and control layout you will use every day.





Write Your Review
No reviews yet. Be the first to share your experience!