

Key takeaways
- Passive cooling: Fanless panels are quiet and have fewer moving parts, but their aluminum body may become hot. Leave air space around the fixture.
- Active cooling: Fans help remove heat from high-output fixtures, but fan bearings and dust are common long-term failure points. Check whether replacement fans are available.
- Mounting height: Adjustable ratchet hangers make it easier to raise a light as plants grow. Fixed brackets are neat for shelves but less flexible.
- Room temperature: Measure the temperature at canopy level, not only near the ceiling. A small fan can improve air circulation, but it should not blast seedlings continuously.
- Moisture: Most household grow lights are not waterproof. Keep water, mist, and nutrient solution away from electrical connectors and drivers.
The best full spectrum LED grow lights are the ones that deliver enough usable light across the plant’s canopy without overheating the room, wasting electricity, or forcing you to mount the fixture at an awkward height.
Our top picks

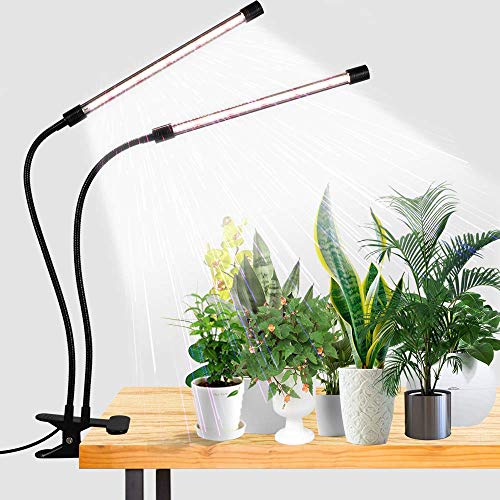

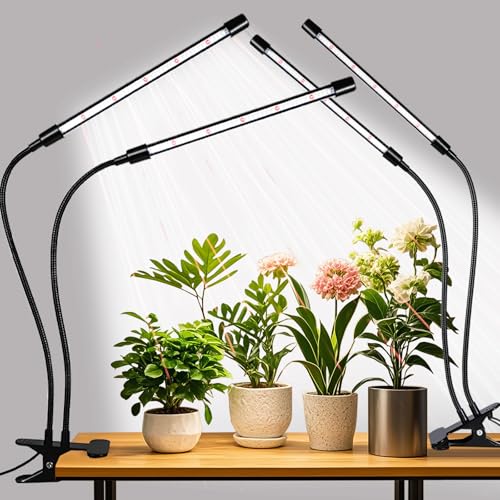
As an Amazon Associate we earn from qualifying purchases at no extra cost to you. Ratings are shown as listed on Amazon.
Quick picks by growing situation
| Indoor growing situation | Best light type | Useful starting power | What to prioritize |
|---|---|---|---|
| One or two herbs on a kitchen counter | Full-spectrum LED bulb or small clip-on panel | 10–25 actual watts | Compact size, timer, low heat, adjustable arm |
| Seedlings and leafy greens on a shelf | LED bar or slim panel | 20–60 actual watts per shelf | Even coverage, low-profile mounting, dimming |
| Several herbs or small vegetables | Dimmable square panel | 100–150 actual watts | PPFD uniformity, hanging height, timer compatibility |
| Fruit-bearing plants or a dense canopy | High-output LED board or bar fixture | 200–400 actual watts | Heat management, wide coverage, reliable dimmer and timer |
For most home growers, a dimmable fixture rated around 100–150 actual watts is the most flexible choice. It can run gently over seedlings, then provide substantially more light for mature herbs and compact vegetables. A fixture’s advertised “equivalent wattage” is less useful than its actual wall draw and measured PPFD.
What “full spectrum” should mean when you shop
Most modern white LED grow lights are described as full spectrum because they provide broad visible light that resembles daylight, often with additional deep-red wavelengths. This is usually a more practical household choice than a purple “blurple” lamp: plants receive useful light, and you can inspect leaf color and pests more easily.
Look for a spectrum that includes substantial blue and red output rather than judging the product by the color of the diodes. Blue light supports compact vegetative growth, while red light is important during flowering and fruiting. A far-red channel can be useful for advanced growing, but it is not essential for ordinary herbs, leafy greens, or seedlings.
The most important number is PPFD, measured in micromoles per square meter per second. It indicates how much photosynthetically useful light reaches the plant at a stated distance. Be cautious when a listing gives only a maximum PPFD at one tiny center point. A light that produces a lower but more even reading across the whole shelf may grow plants better.
Best full spectrum LED grow lights by format
Best for a single plant: a full-spectrum LED bulb
A screw-in bulb such as a Sansi full-spectrum grow bulb suits one basil pot, a houseplant that needs supplemental light, or a small propagation area. Models in the roughly 10–36 watt range are inexpensive and easy to replace. Use a reflector or open socket positioned above the canopy; a bulb placed beside the plant creates uneven, one-sided growth.
This format is not ideal for a tray of seedlings or a wide planter. The light spreads unevenly, and the fixture usually lacks a built-in timer. Pair it with a plug-in timer and keep the bulb’s ventilation openings unobstructed.
Best for shelves: LED bar fixtures
Bar lights from brands such as Barrina and Monios-L are practical for seed-starting racks, microgreens, and leafy greens. A 2-foot bar commonly draws about 20–30 watts, while a 4-foot bar may draw approximately 40–60 watts. Multiple bars distribute light more evenly than one small bulb and sit close to a shelf without taking much vertical space.
Check whether the kit includes linking cables, mounting clips, a power switch, and a timer. Some inexpensive bars are marketed for plants but provide modest output; they may work well for seedlings at close range but struggle with flowering plants. Use two parallel bars when a single bar leaves dark edges.
Best all-purpose choice: a dimmable LED panel
A panel such as the Spider Farmer SF1000, Mars Hydro TS1000, or ViparSpectra P1000 is a strong choice for a small indoor growing area. These compact board-style fixtures commonly draw about 95–150 watts and cover roughly a 2-by-2-foot area for demanding plants, with a larger footprint for seedlings or low-light foliage.
The attraction is adjustability. You can dim the panel for newly germinated seedlings, raise output as the canopy expands, and avoid buying another fixture immediately. Confirm the model’s actual wattage, included hanging hardware, dimming method, and stated coverage at different growth stages rather than relying on the product name.
Best for a larger canopy: LED bar or high-output board systems
For a 3-by-3-foot or larger growing area, use a fixture designed for that footprint instead of stretching a small panel beyond its coverage. A 200–300 watt LED bar or board system usually gives more even edge-to-edge light than a single compact lamp. AC Infinity, Spider Farmer, Mars Hydro, and ViparSpectra all offer larger grow-light systems in this general category.
Higher output also means more heat. Although LEDs are more efficient than older high-intensity discharge lamps, every watt consumed eventually becomes heat in the room. A 300-watt light running 16 hours per day adds about 4.8 kilowatt-hours of electricity use each day.
Comparison of common fixture choices
| Fixture type | Typical actual draw | Practical footprint | Typical hanging distance | Best use |
|---|---|---|---|---|
| LED grow bulb | 10–36 W | One pot, up to about 1 square foot | 8–18 inches | Single herbs and supplemental light |
| 2-foot LED bar | 20–30 W | About 2 square feet | 4–16 inches | Seedlings and leafy greens |
| 100–150 W panel | 95–150 W | About 2-by-2 feet for mature plants | 12–24 inches | Small mixed garden |
| 200–300 W panel or bar system | 200–300 W | About 3-by-3 feet, depending on model | 16–30 inches | Dense or fruiting canopy |
These are planning ranges, not guarantees. Reflective walls, plant height, lens design, dimmer setting, and the manufacturer’s measurement method can change the result substantially.
How to match intensity and mounting height
Start with the manufacturer’s recommended height and use the dimmer before moving the fixture extremely close. As a general starting point, seedlings often need moderate light at 20–30 inches below a panel, leafy herbs may need stronger light at 12–24 inches, and light-hungry mature plants may need high output at 12–18 inches. The correct distance depends on the fixture, so watch the plant as well as the specification sheet.
Long, thin stems and wide gaps between leaves usually indicate insufficient light or excessive distance. Bleached patches, upward-curling leaves, crisp edges, or a sudden drooping canopy can indicate excessive intensity or heat. Change one variable at a time: raise the fixture, reduce the dimmer, or shorten the photoperiod.
For many herbs and leafy greens, a daily schedule of 12–16 hours of light followed by a consistent dark period is a useful starting point. A plug-in timer is acceptable, while an integrated timer is more convenient if it remembers the schedule after a power interruption. Fruiting plants may need stronger light than herbs, but increasing hours indefinitely is not a substitute for adequate intensity.
Energy cost: a quick calculation
Suppose a 100-watt panel runs for 14 hours per day. Its daily consumption is:
0.1 kilowatts × 14 hours = 1.4 kilowatt-hours per day.
At an electricity rate of $0.18 per kilowatt-hour, that costs about $0.25 per day, or approximately $7.56 per 30-day month. A 300-watt fixture on the same schedule would use three times as much electricity, costing about $22.68 per month at that rate.
Use the rate on your electricity bill for a more accurate estimate. A dimmer can reduce consumption, but the saving depends on the fixture’s driver efficiency and the selected output. Timer automation prevents accidental 24-hour operation, which wastes energy and can disrupt plant growth.
Heat, noise, and mounting considerations
- Passive cooling: Fanless panels are quiet and have fewer moving parts, but their aluminum body may become hot. Leave air space around the fixture.
- Active cooling: Fans help remove heat from high-output fixtures, but fan bearings and dust are common long-term failure points. Check whether replacement fans are available.
- Mounting height: Adjustable ratchet hangers make it easier to raise a light as plants grow. Fixed brackets are neat for shelves but less flexible.
- Room temperature: Measure the temperature at canopy level, not only near the ceiling. A small fan can improve air circulation, but it should not blast seedlings continuously.
- Moisture: Most household grow lights are not waterproof. Keep water, mist, and nutrient solution away from electrical connectors and drivers.
Ownership realities: what fails first
LED diodes can last for years, but the entire fixture may not. Cooling fans, power supplies, dimmer knobs, timer electronics, and brittle hanging hardware commonly cause trouble before the LEDs themselves. A replaceable external driver is a useful durability feature because it may be easier to replace than a sealed fixture.
Dust on heatsinks reduces cooling performance. Turn the light off, unplug it, and use a dry soft brush or compressed air according to the manufacturer’s instructions. Do not spray household cleaner onto the panel. Inspect cords periodically for kinks or heat damage, and keep the driver off damp floors.
Common mistakes include buying by advertised equivalent wattage, placing a narrow bar over a wide tray, ignoring the dark period, and mounting a powerful panel too close to tender leaves. Measure the growing area first, select the coverage you actually need, and choose a dimmable fixture with a timer or timer compatibility.
Bottom line
Choose a full-spectrum bulb for one plant, LED bars for shelves, and a dimmable 100–150 watt panel for the most adaptable small indoor garden. Move to a 200–300 watt bar or board system only when the canopy and coverage area justify the extra electricity and heat. The best full spectrum LED grow lights are not necessarily the brightest models; they are the fixtures whose usable intensity, coverage, controls, mounting height, heat output, and running cost fit your particular growing space.







Write Your Review
No reviews yet. Be the first to share your experience!