

Key takeaways
- Brush excess flour from the dough edge before closing.
- Keep the filling at least ½ inch from the rim.
- Press the mold firmly once, rather than rocking it repeatedly.
- For wet fillings, chill the assembled pastries for 10–15 minutes before baking.
- Vent the top of baked pastries if the filling releases steam.
Best Empanada Maker for Stuffed Pastries
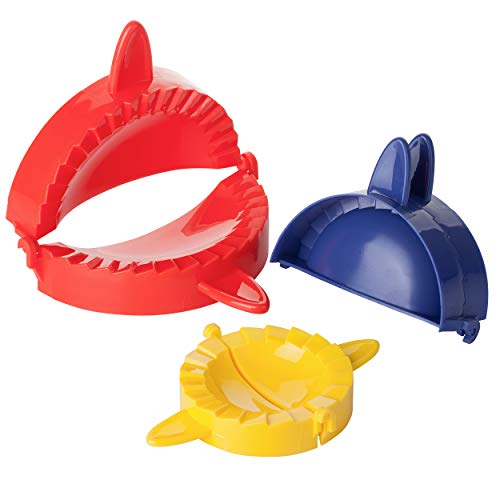
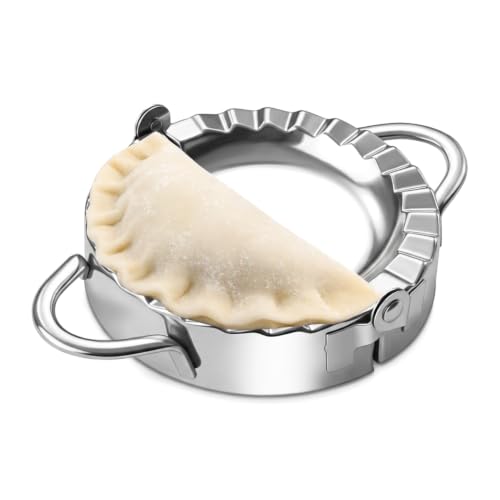
The best empanada maker for stuffed pastries is a manual hinged press with a 5- to 6-inch cavity, a deep filling well, a firm crimping edge, and a food-contact surface made from stainless steel or a clearly specified nonstick coating.
That format offers the best balance of control, pastry size, sealing strength, and cleanup for most home kitchens. A small 3- to 4-inch mold is quicker for appetizers, while an electric empanada appliance is more convenient for producing multiple uniform pastries but usually gives you less control over filling volume and dough thickness.
Our top picks


As an Amazon Associate we earn from qualifying purchases at no extra cost to you. Ratings are shown as listed on Amazon.
Quick comparison: which style fits your kitchen?
| Empanada-maker type | Typical cavity diameter | Pastry capacity | Best for | Main drawback |
|---|---|---|---|---|
| Small manual mold | 3–4 inches | 1 tablespoon filling | Appetizers, children’s portions, limited storage | Easy to overfill; less room for a strong seal |
| Medium manual hinged press | 5–6 inches | 2–3 tablespoons filling | Most home cooks and standard baked empanadas | Requires hand pressure and individual assembly |
| Large manual press | 7–8 inches | 3–5 tablespoons filling | Meal-size pastries and generous fillings | Needs larger dough rounds and more counter space |
| Electric multi-cavity appliance | Usually 4–5 inches per cavity | 2–4 pastries per batch | Frequent batch cooking and consistent shapes | Fixed cavity size, cord storage, and more difficult cleaning |
Best overall: a 5- to 6-inch manual hinged press
For most households, a medium manual press is the strongest choice. A 5-inch cavity generally produces a snack or light lunch portion, while a 6-inch cavity accommodates a more substantial filling without requiring an unusually large sheet of dough.
Look for a press with a cavity depth of at least 1 inch. A shallow mold may look attractive but can flatten the filling and push sauce toward the outer edge, weakening the seal. The upper and lower halves should meet evenly around the entire circumference. If one side closes first, the dough may be thin on one edge and thick on the other.
Aluminum models are common because they are rigid and light. Stainless-steel presses are heavier and usually more resistant to staining, corrosion, and surface wear. A coated aluminum press can release dough easily, but inspect the coating carefully: scratches, bubbling, or exposed metal are signs that it should be replaced rather than scrubbed more aggressively.
What the filling capacity really means
A 5- to 6-inch empanada normally works best with about 2 to 3 tablespoons of cool filling. A useful starting calculation is one level tablespoon per inch of finished diameter, then reducing the amount slightly for wet fillings. For example, six 6-inch empanadas need approximately 12 to 18 tablespoons of filling, or ¾ to 1⅛ cups.
That is a starting point, not a universal rule. Dense fillings such as minced meat or mashed vegetables can be packed more neatly than loose mixtures containing broth, cheese, or large chunks. Leave at least ½ inch of bare dough around the filling so the edges can bond.
Best for strong seals: a deep crimping rim
Sealing strength depends less on decorative ridges than on three practical features: a wide contact area, even closing pressure, and a rim that compresses the dough without cutting completely through it.
A serrated edge can create an attractive pattern, but very sharp teeth may perforate thin dough. A smooth rim followed by a fork crimp gives more control, especially with juicy fillings. For baked empanadas, that two-stage approach is often more reliable than relying on the mold’s pattern alone.
- Brush excess flour from the dough edge before closing.
- Keep the filling at least ½ inch from the rim.
- Press the mold firmly once, rather than rocking it repeatedly.
- For wet fillings, chill the assembled pastries for 10–15 minutes before baking.
- Vent the top of baked pastries if the filling releases steam.
If the press cuts through the dough, use a slightly thicker round or reduce the closing pressure. If the seam opens, the usual causes are excess filling, oily dough, moisture on the edge, or a filling that was still warm.
Fresh dough versus frozen dough
Fresh dough
Fresh dough gives the best fit because you can roll it to match the mold precisely. For a 6-inch cavity, roll the dough to roughly ⅛ inch thick and cut rounds about ½ inch wider than the cavity on every side. The extra margin is what forms the sealed lip.
Let refrigerated dough rest for 10–15 minutes before rolling. Dough straight from the refrigerator may crack at the edges, while dough that becomes warm and soft can stretch unevenly and stick to the press. A light dusting of flour helps, but too much flour reduces adhesion at the seam.
Frozen dough
Frozen pie-crust rounds, puff pastry, and purpose-made empanada discs can work, but compatibility depends on diameter and flexibility. Thaw them in the refrigerator rather than on a warm counter. A frozen disc that is still rigid can split when folded; an over-thawed disc may stick and tear.
Puff pastry expands more than traditional empanada dough and may need a slightly lighter filling load. It is also more likely to leak butter onto a nonstick surface. Avoid forcing a frozen disc into a cavity smaller than the disc: trimming it after placement can leave an uneven seam, while stretching it can cause shrinkage during baking.
Nonstick materials and cleanup
For occasional use, a well-finished coated press is convenient, especially with soft fresh dough. However, nonstick surfaces are consumable. Metal utensils, abrasive powders, and dishwasher heat can shorten their useful life even when the manufacturer labels the tool dishwasher-safe.
Uncoated stainless steel is usually the easiest long-term material to inspect and sanitize. Dough may stick more readily, so use chilled dough and a very light film of neutral oil when appropriate. Aluminum releases well but should not be left soaking for long periods, particularly if the manufacturer does not specify anodized or corrosion-resistant construction.
Clean the press immediately after use. Brush away dry flour first, then wipe with warm water and mild dish soap. Use a soft nylon brush around ridges. Do not close and store the tool while damp; trapped moisture can encourage corrosion around hinges, screws, and seams.
Decision matrix: choose by situation
| Your situation | Recommended choice | Why |
|---|---|---|
| First-time maker with limited counter space | 5-inch manual press | Low cost, easy storage, and forgiving portion size |
| Family meals several times per month | 6-inch hinged press | Better filling capacity without the bulk of an electric unit |
| Party appetizers | 3- to 4-inch mold or multi-cavity appliance | Smaller portions and faster repeated shaping |
| Mostly frozen dough discs | Adjustable or oversized manual press | Accommodates different disc diameters and thicknesses |
| Wet fillings and frequent baking | Rigid stainless-steel press with a wide rim | Better seam control and less concern about coating wear |
Ownership realities: what wears out first?
On a manual press, the hinge, alignment pin, and crimping edge usually matter more than the handle. A loose hinge can produce an uneven seam, while a worn cutting rim may stop trimming cleanly. Before buying, check whether the halves close flush and whether the hinge has visible play when gently moved side to side.
For electric models, the heating plates and hinge are the main wear points. Baked-on cheese or sugar can accumulate around the plate edges, and fixed plates are harder to clean than a separate manual mold. Electric units can save time when making several batches, but they also require you to work to the appliance’s preset size and cooking cycle.
Allow the press to cool before cleaning, and never pry out a stuck pastry with a knife. A silicone spatula or wooden tool protects the surface. Store a manual press flat or with the hinge relaxed rather than clamped tightly, which can stress the hinge over time.
Final recommendation
Choose a 5- to 6-inch manual hinged empanada maker with a cavity at least 1 inch deep, a broad sealing rim, and either uncoated stainless steel or a durable, clearly identified food-safe coating. It is the best all-purpose option for stuffed pastries because it handles fresh dough, most thawed frozen discs, moderate fillings, and both baked and fried preparations.
Choose a smaller mold only when appetizer size is the priority, and choose an electric multi-cavity appliance when speed and uniform output matter more than flexibility. Whichever style you buy, the most important performance test is simple: the press should close evenly, leave a continuous seam, and release without tearing a properly chilled dough round.





Write Your Review
No reviews yet. Be the first to share your experience!