

Key takeaways
- One large section: best for salads, sandwiches, grain bowls, or leftovers.
- Two equal sections: useful for separating a main dish from a substantial side.
- One large and two small sections: versatile for a main, fruit, and a snack.
- Removable dividers: preferable when you alternate between bulky foods and small portions.
Best Bento Box Sets for Meal Prep Made Easy
The best bento box set for meal prep is the one whose compartments match your usual portions, whose seal is easy to clean, and whose containers stack efficiently in both the refrigerator and your bag. For most weekly meal preppers, a modular set of three to five lidded containers with separate compartments is more practical than one large lunch box.
Quick picks by meal-prep situation
| Situation | Best format | Useful capacity | Why it works |
|---|---|---|---|
| Five weekday lunches | Set of four or five individual bento containers | 700–1,000 ml each | Easy portion rotation and fewer containers to wash at once |
| Small refrigerator or crowded work bag | Nested, stackable two- or three-compartment boxes | 500–750 ml each | Uses vertical space and keeps portions moderate |
| Dry snacks and sandwiches | Lightweight plastic bento box with a simple gasket | 600–900 ml | Lower weight and adequate separation without bulky latches |
| Soups, saucy foods, or yogurt | Leak-resistant box with a fully sealing lid, or a dedicated soup container | 500–750 ml | Better protection against spills than loose snack compartments |
| Hot and cold foods in the same meal | Insulated bento such as an OmieBox-style design | Approximately 1 litre | Separates temperature-sensitive foods, but is heavier and harder to clean |
Best bento box set formats compared
Best for weekly portioning: modular compartment containers
Sets such as Bentgo Prep-style containers are designed around preparing several meals in advance. Look for containers holding roughly 700 to 1,000 ml, with one large compartment and one or two smaller sections. This layout suits a main portion plus vegetables, fruit, or a snack.
Our top picks
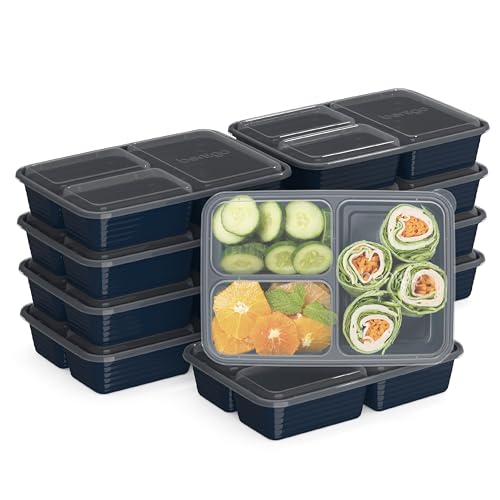


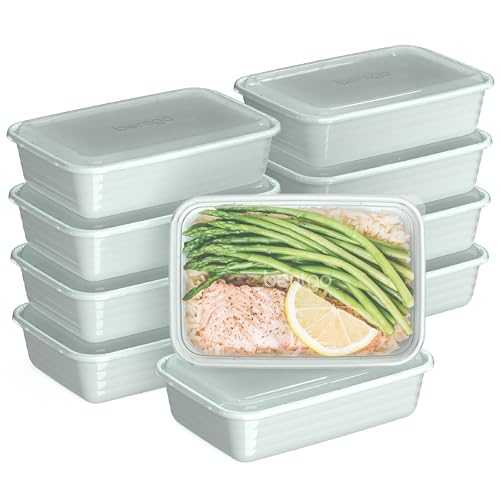
As an Amazon Associate we earn from qualifying purchases at no extra cost to you. Ratings are shown as listed on Amazon.
The main advantage is flexibility: you can use the same containers for rice bowls one day and sandwiches or salads the next. Individual boxes also make it easier to freeze or refrigerate meals separately. The limitation is that compartments within a single container are not usually leakproof from one another. Dressing, curry, and watery fruit can cross into neighboring sections unless packed in a separate sealed cup.
Best for compact storage: nested bento sets
Monbento-style boxes use stackable tiers, often with separate lids or a clasping outer lid. They are useful when refrigerator shelves and lunch bags are narrow because the box footprint stays compact while capacity is added vertically. A two-tier design commonly provides around 1 to 1.5 litres in total, enough for a substantial meal divided between levels.
Stacking solves one problem but creates another: tall boxes can be less stable in a bag, and each tier adds a seal or joining surface to clean. Check the assembled height before buying. A container measuring 14 cm wide and 7 cm tall may fit a lunch bag comfortably; a two-tier version approaching 14 cm tall may not.
Best for hot meals: insulated bento boxes
An OmieBox-style insulated bento combines compartments with a removable insulated food jar. It is a strong option when you want warm soup, pasta, or stew alongside foods that should remain separate. The trade-off is weight, bulk, and more parts: insulation, seals, latches, and a removable jar all increase cleaning time.
Insulated bento boxes should not be treated as a substitute for safe food handling. Chill perishable meals promptly after cooking, and follow the manufacturer’s guidance for filling and holding temperatures. An insulated container can slow temperature change, but it does not make food safe indefinitely.
Compartment layout: choose around your actual portions
Compartments are helpful for organization, not automatic portion control. A useful weekly layout is one large section measuring about 450–650 ml, plus one or two sections of 100–250 ml each. That accommodates a main food, vegetables, and a smaller side without forcing every meal into the same proportions.
- One large section: best for salads, sandwiches, grain bowls, or leftovers.
- Two equal sections: useful for separating a main dish from a substantial side.
- One large and two small sections: versatile for a main, fruit, and a snack.
- Removable dividers: preferable when you alternate between bulky foods and small portions.
For foods that release moisture, leave a little headspace rather than filling every compartment to the rim. Wet ingredients such as tomatoes, cucumber, and dressing are best packed separately or placed in a sealed mini-container.
Leak-proof seals: what to inspect before buying
A lid that closes firmly is not necessarily leakproof. Look for a continuous silicone gasket around the lid and, ideally, a separate seal around each independently sealed compartment. Four-sided locking tabs can compress the gasket more evenly than a single snap, but they also add hinges that may eventually loosen or break.
Use the manufacturer’s wording carefully. “Leak-resistant” may mean the box handles normal transport while upright; it may not survive being placed sideways in a backpack. If you carry soup, select a container explicitly intended for liquids and test it at home with cold water before relying on it.
A simple ownership test is to fill the closed container with water, invert it over a sink for 30 seconds, and inspect the gasket and corners. This is not a guarantee for hot or oily foods, but it can reveal a poorly seated seal or damaged lid.
Microwave, freezer, and dishwasher safety
Microwave compatibility usually applies to the base, not the lid, clips, or outer sleeve. Remove the lid or vent it exactly as instructed. Do not microwave stainless-steel inserts, metal-edged containers, or insulated outer shells. Even microwave-safe plastic can become stained or warped by repeated heating of tomato sauces and high-fat foods.
For meal prep, freezer compatibility matters almost as much as microwave safety. Leave expansion space in a container holding soup, cooked grains, or other liquids. A practical rule is to leave at least 1.5 cm below the lid. Allow frozen food to thaw in the refrigerator rather than forcing a frozen, tightly sealed container directly into high heat.
Dishwasher-safe bases are convenient, but seals often last longer when removed and washed separately. Place small silicone gaskets in a mesh basket so they do not fall onto the heating element. Dry every component fully before reassembly; trapped moisture under a gasket is a common source of odor.
Decision matrix for buying the right set
| Your priority | Choose | Avoid | Reason |
|---|---|---|---|
| Lowest upfront cost | Basic plastic set with 2–3 compartments | Insulated or multi-tier systems | Fewer parts and commonly lower market pricing, around $15–$30 per set |
| Daily use for several years | Thick, BPA-free plastic or stainless-steel construction with replaceable seals | Very thin lids and permanently attached fragile clips | The gasket and latches usually wear before the base |
| Maximum leak protection | Independently sealed compartments or a dedicated liquid container | Open compartments sharing one loose lid | Internal dividers rarely stop liquids from moving between sections |
| Small storage space | Nesting or vertically stackable boxes | Wide, permanently divided trays | Nesting reduces the empty-storage footprint |
| Lightest commute | Plastic container around 150–300 g empty | Glass or insulated metal systems | Materials affect bag weight before food is added |
A practical five-day setup
For five lunches, a set of five 800 ml containers gives a total nominal capacity of 4,000 ml. If each box is filled to about 85% to leave room for mixing and safe closure, usable capacity is approximately:
5 × 800 ml × 0.85 = 3,400 ml
That is enough for five moderate meals, but it does not mean every box should contain identical food. Prepare two main dishes, three vegetables or salads, and several separately sealed sauces. Assemble only two or three days ahead when possible, keeping later meals refrigerated or frozen according to the ingredients.
- Cool cooked food in shallow containers rather than sealing a large steaming batch.
- Divide the main food first, leaving headspace and avoiding pressure on the lid.
- Pack crisp toppings, dressings, and crunchy snacks separately.
- Label the preparation date and intended eating day.
- Wash and dry gaskets, lids, and bases before stacking empty containers.
Durability and ownership realities
Seals, hinges, and latch tabs are the parts most likely to wear. Silicone gaskets can stretch, absorb odors, or flatten after repeated dishwasher cycles. Clear plastic may scratch, and scratches can make stains and odors more noticeable even when the container remains usable. Glass resists staining but adds weight and can chip or break; stainless steel is durable but generally cannot go in the microwave.
Before purchasing a set, check whether replacement gaskets and lids are sold separately. A slightly more expensive set can cost less over its useful life if a $5–$12 seal replaces an entire container. As a rough ownership calculation, a $30 set used twice a week for two years costs about 29 cents per use:
$30 ÷ (2 uses × 52 weeks × 2 years) = approximately $0.29 per use
The best choice is therefore not the box with the most compartments. It is the set that fits your portions, seals the foods you actually carry, stacks in your available space, and can be cleaned without leaving parts forgotten in the sink.





Write Your Review
No reviews yet. Be the first to share your experience!